Tag: camera review

  • Lens comparison: Nikon AF-S 50mm f/1.4 G vs Nikon Z 50mm f/1.8 S lens

    Lens comparison: Nikon AF-S 50mm f/1.4 G vs Nikon Z 50mm f/1.8 S lens

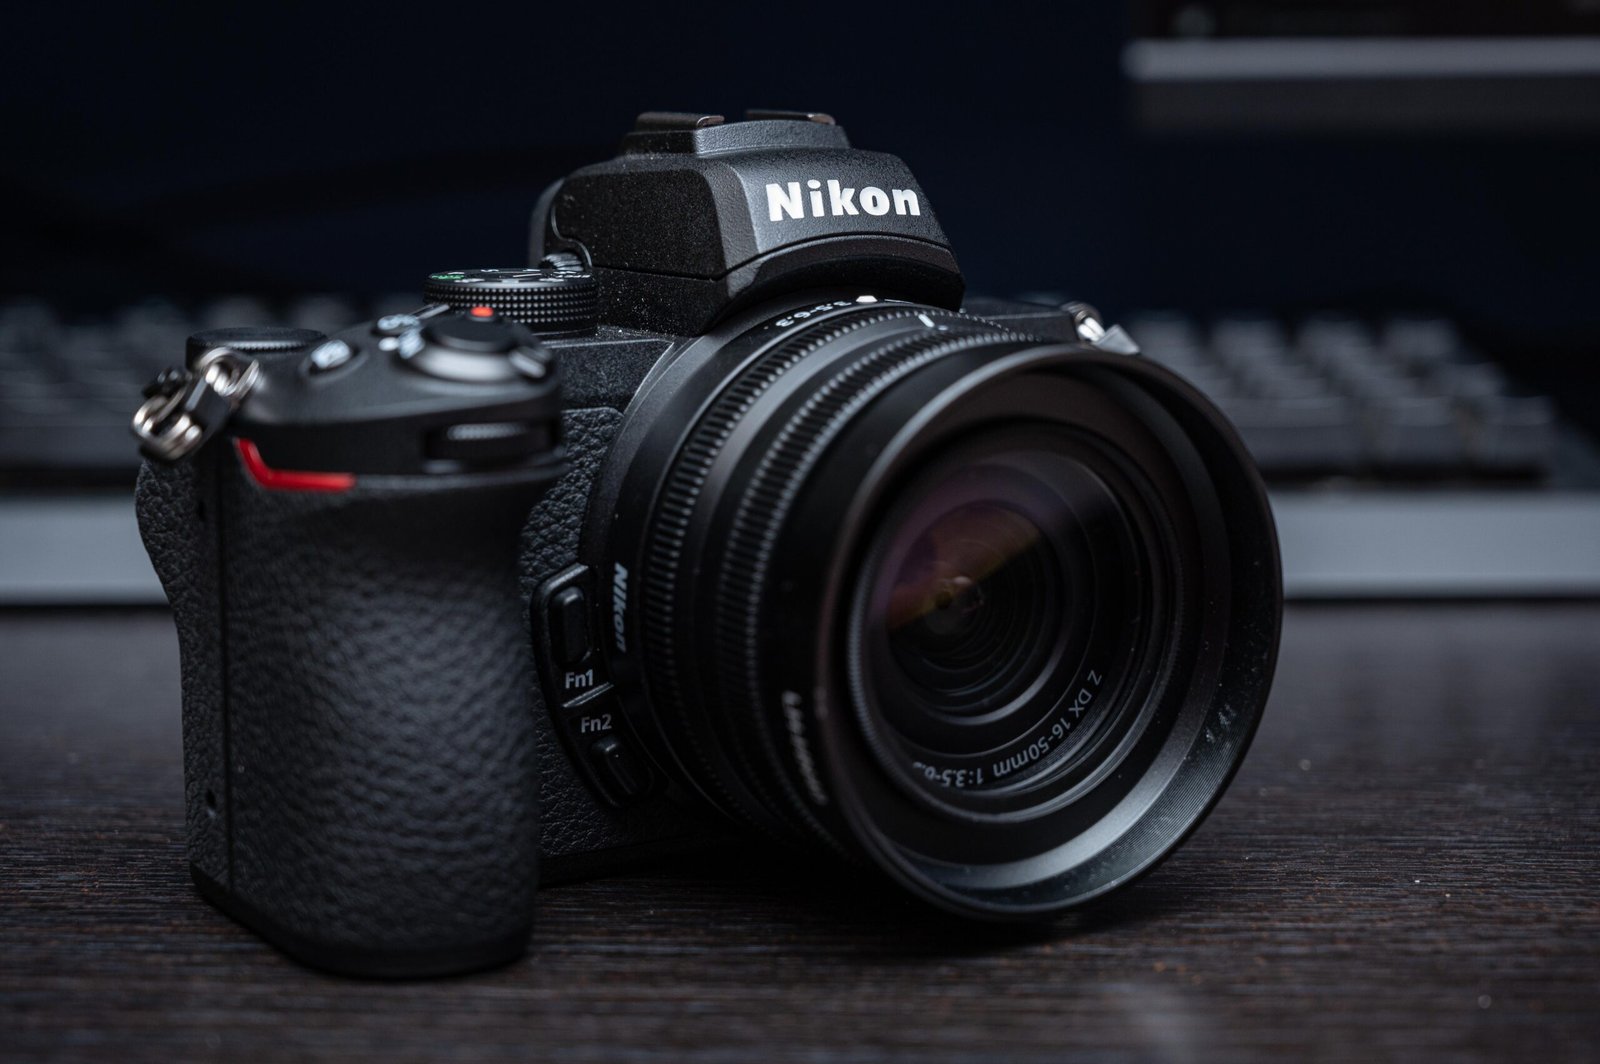
    I recently got my hands on a copy of the Nikon Z 50mm f/1.8 S lens (hereby called the 50mm 1.8 S). Having made the transition to Nikon Z series cameras after almost 10 years with the DSLRs, I have been slowly but surely transiting to the Z system, including lenses.

    I was curious as to how it compared to my stalwart companion of coming 10 years, the Nikon AF-S 50mm f/1.4 G, here called the 50mm 1.4 G. I was able to do some comparisons of the two lenses’ image quality plus anecdotal comparisons of usage experience.

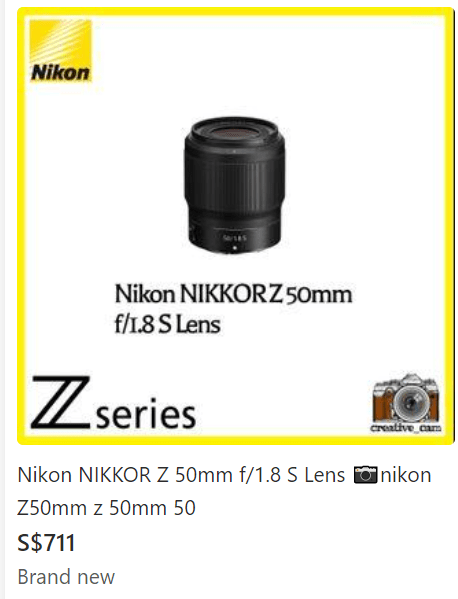
    The Nikon Z 50mm f/1.8 Price in Singapore

    listing of the Nikon Z 50mm f1.8 on carousell in Singapore, a second hand platform
    Listing from camera stores on Carousell, a 2nd hand platform

    I was always a fan of getting used gear as I had the confidence in being able to check them before making the purchase. I got my Nikon 50mm G at SGD$400 almost 10 years ago on a used gear forum in Singapore.

    Recently, I bought the Nikon Z 50mm 1.8 S at a reasonable price of SGD $450 (a hefty 37% discount from the street price of about $711). While I am looking to offload the G lens (still going strong!) to cover some of the cost of the S lens, readers may wish to look out for a similar deal in your home country and get this lens if you can (spoiler alert!)

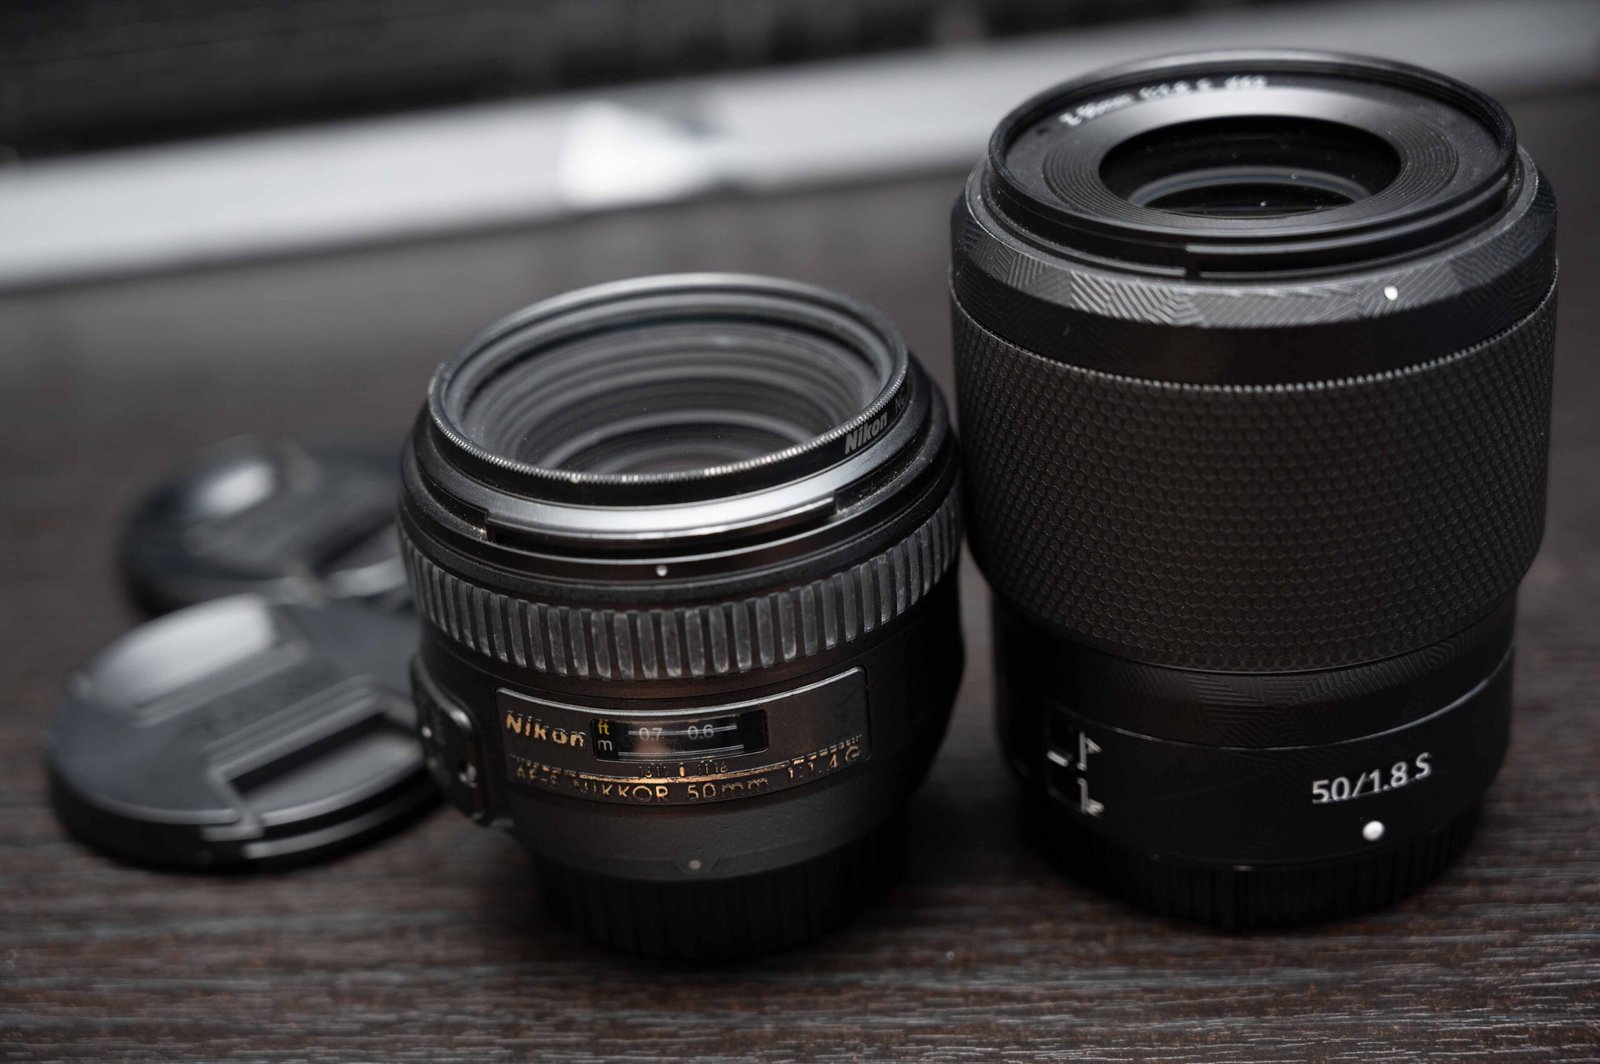
    Comparing the Weight and Size of the 50mm 1.4G vs the 50mm f/1.8 S

    nikon 50mm 1.4g with FTZ adaptor and nikon 50mm 1.8S
    The 50mm G and FTZ combo is about the same size as the 50mm S

    The Nikon 50mm S f1.8 weighs 415g, basically the same as the G lens and FTZ combined (G lens at 280g + FTZ at 135g = 415g). One issue that held me back with getting the lens initially was the weight. I was far to accustomed handling the Nikon D750 and 50mm G lens and that was such a compact combo.

    However, having shot with the 50mm S on assignment and also during my cruise trip, I must say that the 50mm S balances very well with the Nikon Z6 Mk I and I had no major issues with handling.

    Filter thread

    filter thread comparison, 58mm for the G lens and 62mm filter thread for the S lens
    filter thread comparison, 58mm for the G lens and 62mm filter thread for the S lens

    Unfortunately, upgraders will need to get new filters for the 50mm 1.8 S if you use them. The filter thread is now 62mm instead of the old and somewhat more common(?) 58mm. Not a big issue if you don’t use them at all though.

    Image Quality differences between the 50mm G and Z lens

    Sharpness and contrast

    Centre crop: Nikon 50mm f/1.8S on the left | Nikon 50mm f/1.4G on the right
    Centre crop: 50mm f/1.8S on the left | 50mm f/1.4G on the right

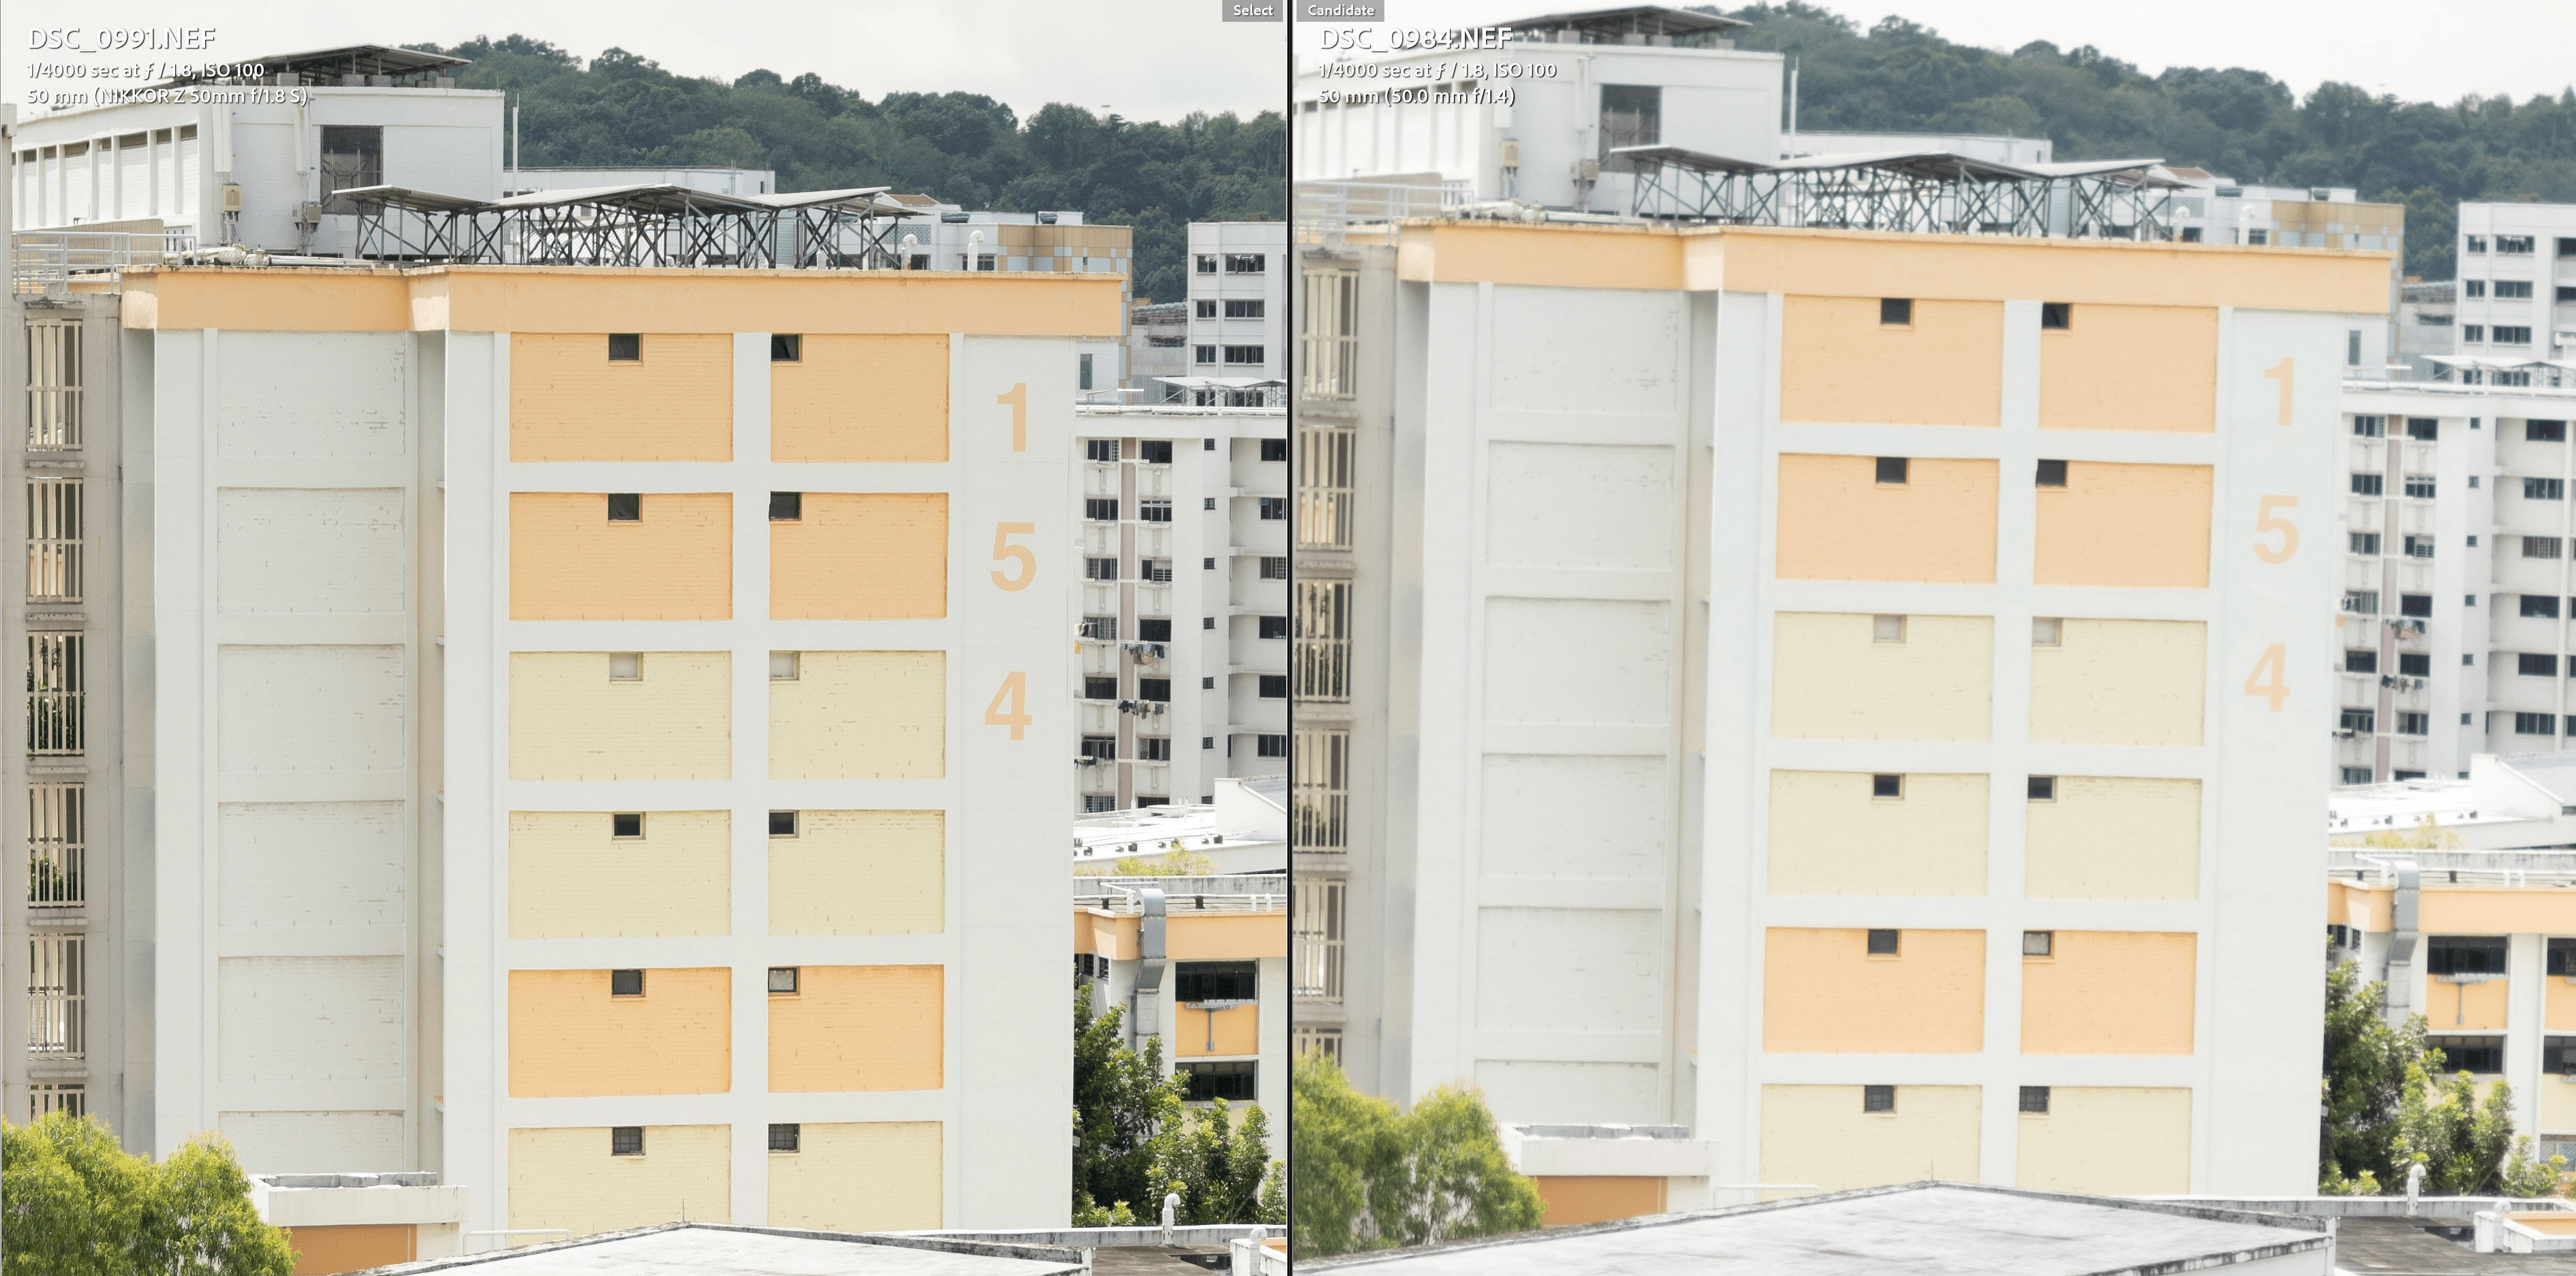
    Lens optical designs have come a long way. Nikon was not kidding when they said that they designed the S series for professionals. This is a sharp lens.

    Above is a centre crop of the images taken with both lenses. In Lightroom, blown up 100%, I can still see individual brick details on the 50mm S. The 50mm 1.4G in comparison, looks like I misfocused (I didn’t, trust me). Both lenses were shot at f/1.8.

    Differences in contrast levels between the lenses is also like heaven and earth. The S lens has plenty of “bite” that the G lens simply lacks. In contrast (pun intended), the G lens looks blurry and hazy (like me after drinking too much whisky).

    Z mount on the left, F mount on the right. Showing blurriness for the F mount and sharp corners for the Z mount lens
    Z mount on the left, F mount on the right.

    The corners on the 1.4G lens was a mess, more blurriness and haziness in the corners. Granted, for my use case at f/1.8 or 1.4 on the G lens, I tend to position my subjects in the central area (not dead centre though). I don’t tend to care about corner performance much, but if I had to position my subjects in the corners shooting wide open, I would think twice.

    On the other hand, the 50mm S had no issues with corner sharpness whatsoever. Whatever engineering the lens designers had to do to provide this level of image quality on this lens, it was worth it.

    Image sharpness is through the roof. In Lightroom, I was able to zoom in 100% and see the individual leaves on the trees, even in the corners. The image will sharpen up as you stop down from 2.8 to 4, but to be honest, I would have no qualms positioning my subject anywhere on the frame.

    Fringing issues

    200mm crop of the Nikon 50mm 1.4G showing heavy purple fringing
    200% crop: 50mm G with heavy purple fringing
    200mm crop of the Nikon 50mm Z 1.8 showing little to no fringing
    200% crop: 50mm S with little to no fringing

    Fringing is an issue that is quite easily solved for Lightroom users, just tweaking the slider will help with removing the ugly purple fringing that usually pops up at high contrast areas.

    The performance from the S lens is stonkingly good, I don’t know what Nikon did when they made the lens or optimised the software in camera for the lens, but I hope they continue it!

    Bokeh

    Bokeh is always subjective, personally, I don’t mind the bokeh from the lens. Here are some sample shots of random food and drinks for reference.

    bokeh on the Nikon Z 50mm 1.8S
    shot at 1.8
    bokeh on the Nikon Z 50mm 1.8S

    Autofocus

    Large Focus ring on the Nikon Z 50mm 1.8S
    The focus ring is pretty wide, but focus by wire only. There is no AF distance marking (lens has been wrapped with carbon fibre)

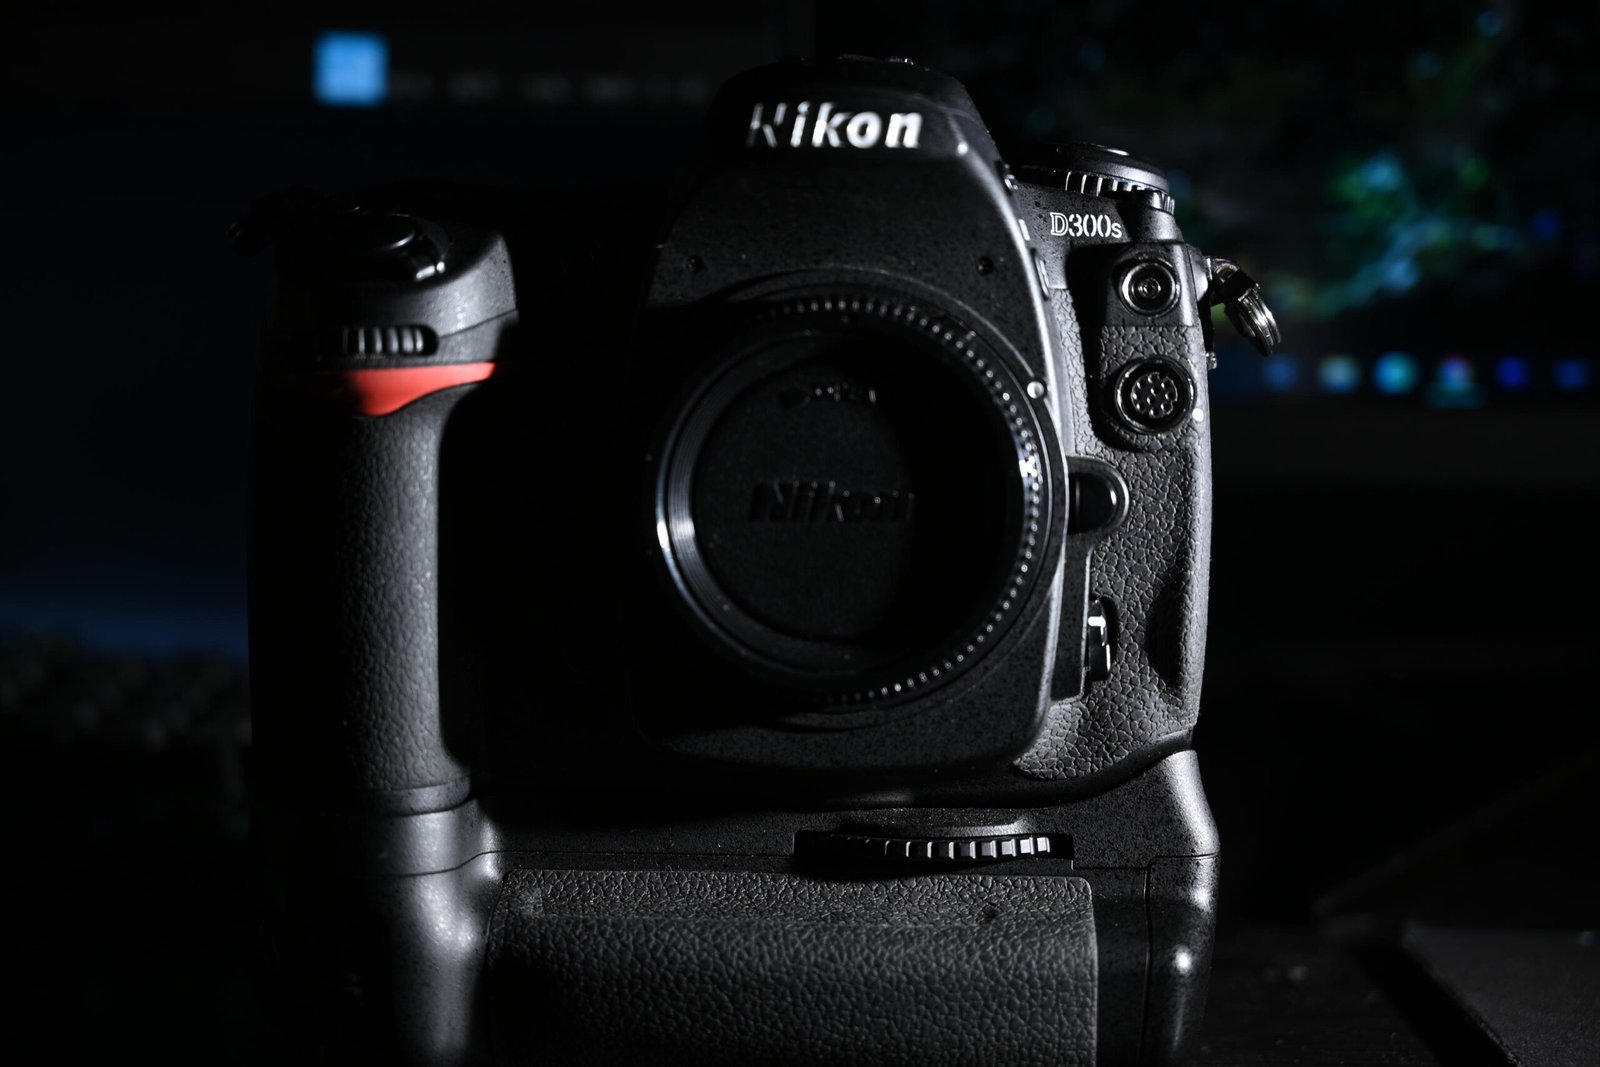
    Right when it was released, the Nikon 50mm f/1.4G lens was never an award winning design for autofocus speed. Even compared to the original AF-S 50mm f1.8 G, AF speed wasn’t that fast or even slower.

    The original D lenses were way faster. Still, in terms of accuracy, I had no issues all these years with my D3, D800 and finally D750, even when I was using the outer AF points. On my Z6, the 50 G and the FTZ combo worked well for sure.

    The 50mm f/1.8 S, however, was noticeably faster on my tests and smoother. I suspect that the smoothness is due to the new stepping motor that has been implemented in the Nikon lenses recently. AF wise, this lens is a no brainer for hybrid shooters looking to upgrade. One issue, however, is that the focus ring on the S lens is fly by wire. This is one thing I don’t like.

    Call me an old fogey, but sometimes I do prefer to manual focus and in those situations, I would like to have precise control and know that me turning the ring will also move the elements in the lens. Not a dealbreaker, but people getting the lens should definitely take this into consideration.

    Should you upgrade from the 50mm 1.4G to the 50mm 1.8 S?

    The 50mm 1.4G lens has been a staple of Nikon photographers everywhere, from amateur right up to working professionals. I still remember when the Nikon Z 50mm 1.8S was announced, people were groaning everywhere as soon as they saw the 1.8 maximum aperture.

    I remember being somewhat disappointed myself at the announcement, since my perception of “pro-ness” usually meant a big, chunky lens with a large sexy aperture.

    Granted, the lens wasn’t that small, but it was a part of the S line prime lenses that were all more or less the same size and design aesthetics, so it looked pretty nice to me and handy too.

    When I finally was able to get a copy of my own (I’ve already used a few loaner lenses before), I was quite comfortable with the lens and it’s performance.

    I would buy it again if a similar deal came along, would you get one? 🙂

    Key points:

    Pros

    -Somewhat light

    -Sharp wide open, shoot with impunity

    -Optically outstanding

    -Somewhat cheap (better prices for used gear)

    Cons

    -Not that cheap compared to traditional nifty fifties, especially brand new

    -No f/1.4 aperture (in 2024, there is a 1.4 vers!), there is also the massive and expensive f/1.2 lens if you need it

    Other articles:

    I also do a comparison of the F and Z mount 85mm lenses and review the Z mount 35mm 1.4.

    Personal Plug by Chris Puan

    If you enjoy my blog content, please consider supporting the website by buying me a coffee here. Thanks for your support! 😀

    https://www.buymeacoffee.com/Chrispuan

  • Nikon Z50 field review (short term)

    Nikon Z50 field review (short term)

    The Nikon Z50 was released in November 2019, about 1 year after the initial release of the full frame mirrorless cameras Z6 and Z7.

    Initially, upon the spec leaks, many Nikon fans groaned at the lacklustre specs, at that time, an APS-C sensor that was already in use for several years in the D500, no dual card slots, no AF joystick, no in-body image stabilization (IBIS). Many were already calling the Nikon Z50 a failure even before it was released.

    Now, coming on 2 years after the release, I was able to get a used set in near mint condition and put it through it’s paces. I have been shooting with Nikon ever since I started on my photography journey more than 10 years ago, and have gone through a slew of consumer and pro grade DSLRs in my quest to find value for money cameras that will serve me well in my work.

    Here are my thoughts on the Z50 from both a work and casual usage viewpoint.

    Revision: As I am writing this article, the Nikon Zfc has just been released. To some extent, some of the comments here also apply to the Zfc since the two cameras largely share the same specs such as sensor, viewfinder, single card slot and battery (EN-EN25) etc.

    The Nikon Z50’s Ergonomics

    Weight

    The first thing that struck me when I picked up the camera was the weight. One of the original arguments for choosing mirrorless over a DSLR was that mirrorless cameras are lighter. Definitely the case here.

    The Z50 weighs 450g. It’s a small, compact, lightweight camera that one can throw into a small bag and carry around with no issues, assuming you pair it with the kit lens or a small third party lens like the Meike 25mm 1.8 prime.

    Grip

    Meike 25mm 1.8 lens mounted on a nikon z50
    The small body matches a small prime like the Meike 25mm perfectly

    Usually, cameras that are built to be as small as possible may sacrifice grip comfort to minimise weight, the old Olympus EP-Minis come to mind.

    Here, I feel that the grip is sufficient for small to medium lenses mounted on the camera. The sculpted grip still allows enough finger room for small and medium sized hands.

    Nevertheless, people with large hands might feel this camera is a little cramped, with your pinky hanging out while gripping the camera.

    If you need more vertical room, you may want to invest in a Smallrig L plate, which adds grip room as well as additional tripod mounting options to even allow side mounting for your to see the screen even with a tripod.

    As you can see from the pictures above, the body is tiny on any of the larger telephoto lenses, like the older version of the 300mm f/4 that I have here.

    I would definitely advise holding the combination by the lens rather than the body so as not to stress the mount. It’s unlikely that the lens mount will break or snap, but better safe than sorry yeah?

    Battery / Memory card slot

    The battery used here is a new EN-EL25. The battery doesn’t last as long as the EN-EL15 used in the bigger brothers Z6/Z7. Luckily, the Z50 is able to charge the battery using the micro USB port on the side and attaching a power bank.

    Charging can therefore be done in camera as well as using the external charger (provided). When charging using a power bank, there will be a small red LED lighting up to let you know that charging is on.

    Charging using a generic power bank using micro USB port.

    Unfortunately, the single memory card slot can only accept UHS-I SD cards. While these cards are generally cheaper, they are also slower.

    For my purposes, I have yet to encounter any issues with transfer speed. I would imagine someone who does a lot of burst shots needing a faster card, however.

    Top dial

    nikon z50 with kit lens, top plate right

    The top dial will be familiar with anyone who has used a consumer grade Nikon DSLR. That’s not to say this is bad.

    The consumer grade dial comes with the U1 and U2 memory bank functions, which I personally prefer over the menu bank system in the older pro grade bodies.

    Maybe it’s a user issue, but hey, I find this system easier to use, save the settings to either U1 or U2, and once you switch to that setting, presto, all your settings are there. I usually leave U1 for low light settings without flash, and U2 for flash settings indoors when I am covering events.

    Back buttons | Screen | Viewfinder

    The back of the screen is dominated by the LCD panel which only flips down and up, but not to the side like quite a few other brands.

    I’m not sure why Nikon has designed it as such but I would personally prefer a full articulated screen for ease of use, especially when using the screen in a vertical manner (I’ve previously tried this with the D5100, which I found extremely convenient).

    The touch screen zoom and display buttons are an interesting implementation, some people would have preferred physical buttons since you can actually feel them, especially with gloved hands.

    In Singapore, with tropical, warm weather, this is not an issue for me. Luckily, the centre “OK” button still works as a one button zoom during playback.

    One thing about the Z50 is that most of the back panel functions can be accessed with your right hand, so if you’re someone who likes to operate the camera one handed, you can do it here.

    The viewfinder is large enough, sharp and has a decent refresh rate. In photo mode, I never had an issue looking through the viewfinder to frame my image, even for wildlife photography.

    In video mode, however, there is a slight lag when looking through the viewfinder which I found reflects your settings in video. Personally, I am not a fan of this but there may be some people who like working like this.

    Flash

    The in-built flash on the Z50 is tiny. Unfortunately, its power is lacking for all but the closest subjects. Using it for fill is fine, but don’t expect it to light up subjects if they are standing more than 1m away, especially at ISO 100.

    Using the flash in conjunction with a higher ISO will yield better results at night if you simply want to see your subjects (eg. you are taking a holiday shot at night and want to see someone’s face).

    Still, having the flash means you have a means of controlling external flashes remotely if you so desire. I personally use the in-built flash in manual mode and then control my two manual flashes using S1 receiver mode.

    Image Quality on the Nikon Z50’s 20.9MP sensor

    Resolution

    scarlet backed flower pecker shot on nikon z50 using 300mm f4
    Scarlet Backed Flower shot using Nikon Z50 and 300 mm f4 lens

    Officially, the Nikon Z50 has 20.9MP of resolution. I was able to crop in to the image to focus more on the flowerpecker here.

    In Lightroom, I was still able to see individual feathers and tons of detail despite already cropping in. I believe there are no issues with resolution for normal purposes (like posting for social media) though I imagine you may be able to get better results with wildlife photography if the resolution were to be higher.

    For wildlife though, I use a 300mm lens paired with a 1.4x teleconverter (pictured earlier) on this crop-sensored body to get a 630mm equivalent (300 x 1.4 x 1.5) field of view. Article of the combo here.

    monitor lizard shot with a 300mm prime on the nikon z50
    Shot using the Z50 with the Nikon AF-S 300mm f/4
    monitor lizard shot with a 300mm prime on the nikon z50
    Shot using the Z50 with the Nikon AF-S 300mm f/4

    Base ISO Image Quality

    night shot on the nikon z50 using iso 100
    Shot at Based ISO on Nikon Z50

    At base ISO, as seen from the image above, shots are clean and detail, again, no issues. I would definitely be able to get good shots for both my own projects and for clients at base ISO, since I’ve not had the need for 45 MP pictures (at least not had the request from clients yet).

    Shadows are extremely clean, and there is a lot of detail in the raw photo for a 20MP image.

    High ISO

    night shot on the nikon z50 using iso 6400
    Shot at ISO 6400 on Nikon Z50

    Taking pictures in low light is an issue with the kit lens due to the small max aperture of f/6.3. However, as stated by DPReview, this 20.9 MP sensor from Nikon is potentially a tried and proven sensor (used in the D500 and the D7500) with very good dynamic range and low light performance.

    Using it at up to ISO 6400 is definitely not an issue. Thankfully, one does not need full frame just to shoot useable images at ISO 6400 these days 🙂

    From the sample shot here, despite being shot at ISO 6400, I noticed very little banding or color noise in the shadows. Highlight recovery was possible as well, I was able to pull the highlight slider to -82 in Lightroom to recover detail from the overexposed areas (in the lit areas in the apartment blocks).

    The only issue is that as the image is quite grainy, some noise reduction will need to be applied depending on your personal preference.

    Autofocus on the Nikon Z50

    Single AF

    Female scarlet backed flowerpecker below it’s nest (top left)

    In single AF mode, you can control the specific point to focus on. In this case, this was the best setting for a small birding hiding in the middle of foliage. The single point AF was reasonable quick and accurate.

    Continuous AF

    This is very lens dependent, but using a pro grade 2.8 zoom lens will help a lot with the speed of continuous AF. Using the accompanying kit lens is a hit and miss affair.

    In good light, even the kit lens will give you good results, with fast, accurate continuous AF assuming that you are landing the AF point on an area of contrast (basically not a plain white wall). In low light, the small f/6.3 may be affecting the speed of focus to some extent.

    More testing will be doing when I bring this lens out for a birding trip, keep a look out for that!

    Video on the Nikon Z50

    I primarily use the camera for casual photography, but from my light usage regarding video, I realised that the video specs are largely the same as the Z6, of course without the full frame sensor.

    Another issue would be the lack of raw video output over HDMI and also no 10-bit footage when recording using an external recorder like the Atomos.

    My experience with the Flat profile in video is pretty good. The footage grades quite easily in Da Vinci Resolve and offers decent results.

    Using adapted lenses with the FTZ Adaptor

    I have mixed feelings using the Z50 with F mount lenses using the FTZ adaptor. I’m glad that the adaptor allows me to use all my F mount AF-S lenses, no issues at all.

    Third party lenses work fine on the FTZ adaptor. Lenses with a built in motor, basically those that used to work on the D5xxx series of cameras, will work. For example, my beloved Sigma Art 35mm f/1.4 works just fine.

    Your mileage may vary depending on the age and whether the third party lens has a built in motor.

    Conclusion

    So, do I regret the purchase after 2 months?

    No.

    Why I like the Nikon Z50

    I enjoyed the small size of the camera, especially since I also have a small, third party, manual Meike 25mm f/1.8 prime lens. The entire kit can basically fit in a small camera bag and weighs less than my 300mm f/4 telephoto prime.

    The single point autofocus is definitely snappy and accurate, especially when using higher grade lenses with better AF systems such as the 2.8 zooms and of course the native Z mount lenses.

    I also enjoy the ability to autofocus quickly in video, plus there is no additional crop on top of the existing crop from the sensor size compared to the Nikon D7500 and the D500. Hence, feel free to shoot wide angle footage in 4K using the kit lens (not possible in the two aforementioned DSLRs)

    Cons of the camera

    My issues were regarding ergonomics. Coming from the Z6, I was used to the large grip and had some trouble with pressing some buttons sometimes, especially since I much prefer using back button autofocus.

    Another issue is with the zoom buttons and the back panel display switch being touch buttons on the LCD itself. I would much prefer physical buttons, especially if I happen to be wearing gloves.

    My final beef was that there is no sensor based stabilisation in the APS-C bodies. After getting used to it in the Z6, dealing with shaky images in the viewfinder was not very pleasant with unstabilised lenses (most of my lenses are unstabilised, F mount lenses).

    Still, the Z50 serves it’s purposes, as a reliable, second camera in case I need a backup for my Z6 during paid shoots. The smaller sensor also helps me when I’m out shooting wildlife.

    Finally, having a camera using SD card as storage is good for me if i ever travel again (after this entire Covid situation is over) since I can get SD cards quite easily if I need one in a pinch.

    If you’re able to get one used for a good price, take note of some of the issues here, but rest assured this camera is still a capable one that offers the user a lot of features for the price.

    If you’re looking to improve the ergonomics of the Z50, check out this grip by Smallrig.

    Also, check out my comparison of the Z50 and the Z30.

    Personal Plug by Chris Puan

    If you found this article useful, please consider supporting me here to help pay the bills. Thanks in advance 🙂

    https://www.buymeacoffee.com/Chrispuan

  • Meike 25mm f/1.8 lens review on the Nikon Z50

    Meike 25mm f/1.8 lens review on the Nikon Z50

    When the Nikon Z50 (my thoughts here) was released in 2019, many Nikon photographers were dismayed when there were only 2 native lenses at launch and even now in 2021 there is only one more additional DX lens in the Nikon roadmap. It was then up to 3rd party lens manufacturers to fill the void, and one the players that stepped up was Meike.

    *2025 update, there are now many third party lenses from Sigma, Viltrox and TTArtisan to fill in the gap of crop sensored lenses.

    Meike launched a cheap, manual 25mm f/1.8 prime lens for the APS-C Z mount that was listed at US$99.45 at the time of writing. It then begs the question, does the lens deliver sufficient quality for use on the Nikon Z50? How is it in use?

    Is it rubbish since it is after all a cheap lens at less than a 100 USD?

    Let’s dive into these questions in this mini review.

    *This lens was bought using my own money, no one sent me a free item or paid me to do this. All views are my own.

    Lens Aesthetics and Ergonomics

    meike 25mm on the nikon z50

    When I first handled the lens, I was pleasantly surprised at how dense and well built the lens is despite the wallet friendly price tag. Meike (美科) is a Hong Kong company previously known for making knock off products such as battery grips and flashes, they didn’t have a name for making pricey, premium items in the past (but their brand is now making cinelenses!).

    The feeling in hand and first impressions of the lens is definitely above my expectations.

    While I wouldn’t drop this lens for no reason to test it’s sturdiness, I can say that since this is a manual lens, it should survive impact to some degree since there are no electronics to be damaged.

    The front optical element is nestled somewhat within the front of the lens, thus negating the need for a lens hood to shield the element from side light.

    For those who may need a filter when using the lens, it uses a 49mm diameter filter, slightly bigger than the 46mm of the native Nikon 16-50mm f/3.5-6.3 lens.

    Focus and aperture ring

    meike 25mm lens in the hand, lens body

    The focus and aperture rings are both smooth, as expected from a fully manual lens.

    For video shooters especially, the de-clicked aperture ring will be a godsend when you are worried about the lens affecting the audio for your video as you are adjusting the aperture either for creative purposes or simple for exposure control.

    Focusing on the Nikon Z50 is not ideal. While I have enabled focus peaking, for critical sharpness, i still prefer a zoomed in view of the subject in order to verify that I have exact focus. This is especially if you are shooting wide open at f/1.8.

    For stationary subjects, this should not be an issue. For moving subjects in street photography for example, this would be something you might want to plan ahead for.

    Lens Mount

    meike 25mm lens in the hand, lnes rear element
    A very welcome metal lens mount

    Unlike the kit lens, this manual lens, despite being cheap, uses a metal mount. Not a big issue for both lenses since they are so light anyway, but I personally prefer metal mounts since I have seen the old nifty 50mm f/1.8 Canon lenses break at the mount.

    Image Quality from the Meike 25mm f/1.8

    Lens Sharpness

    I did several test shots using the marked apertures on the lens. The sample images below:

    meike 25mm 1.8 at f1.8
    f/1.8
    meike 25mm 1.8 at f2
    f/2
    meike 25mm 1.8 at f2.8
    f/2.8
    meike 25mm 1.8 at f4
    f/4
    meike 25mm 1.8 at f5.6
    f/5.6
    meike 25mm 1.8 at f8
    f/8
    meike 25mm 1.8 at f11
    f/11
    meike 25mm 1.8 at f16
    f/16

    Basically, while shooting the sample images, I would say that sharpness is not an issue, especially in the centre of from the frame. For best results, I would shoot at apertures of between f/2.8 to f/5.6 for maximum sharpness.

    In low light conditions, to be honest, shooting wide open is not really an issue for me. However, for landscape shooters or for people who require edge to edge sharpness, you’re barking up the wrong tree here with this lens.

    The corners are quite soft and you can really tell the difference in image sharpness when comparing it to the centre.

    image from meike 25mm showing potential field curvature
    Potential evidence of field curvature, note the floors on the centre right seems blurry even though the left side is sharp

    During one of the tests, while taking a shot at infinity and at f/4 I noticed an anomaly with my copy of the lens. It appeared that there was some field curvature or optical element misalignment.

    Normally you would expect that the image is sharp across the plane at infinity focus, but there was one patch of the image near the centre of the frame where the image is obviously soft.

    More testing is needed but I would recommend that potential buyers of the lens test if they can or check their return / exchange policies before buying.

    One might also say that I am being too picky since this is only a cheap lens, but I would say that you are paying good money for it so you should expect some degree of quality from the lens and not put up with a defect.

    Lens Vignetting

    meike-25mm-sample-bokeh
    Taken wide open at f/1.8

    As you can see from the image above, there is little or no vignetting/ light fall off on the crop sensored Z50. Even at wide open, without any correction in post, I felt that this was not an issue at all for normal usage.

    For fun, I’ve mounted the lens on the full frame Nikon Z6, here’s how it looks at f5.6
    Another shot, this time on Z6 again at f/1.8, wide open

    For those looking to try mounting the Meike 25mm 1.8 on the full frame Z cameras, unfortunately, the lens does not work well because it was not designed to fit the larger full frame sensor.

    As can be seen from the sample images above, there will be a circle when you try to shoot using the lens at no crop on the Z6 (or other full frame Z cameras).

    Flare

    Meike 25mm 1.8 Image quality check flaring

    I would say that flare is controlled in this lens. Shooting directly into a light backlighting my subject, there was only one spot of green flare to the opposite direction of the light, with some loss of contrast.

    In a real life shooting situation with the morning or evening sun backlighting your subject, I believe the loss of contrast may actually be beneficial to the overall feel of the photo.

    Bokeh

    meike 25mm taken at close up
    Close up bokeh

    Personally, I have no issues with the bokeh rendered by the lens. This was taken at near minimum distance (about 25cm).

    meike 25mm portrait, 1-2 m away
    Shot wide open on the Z50
    dsc_0154 meike 25mm portrait, 3-4m away
    again, shot wide open on the Z50, the background is about 3-4m away from the subject

    As this is a 25mm lens on an APS-C body, you would not expect extreme bokeh from it. Nevertheless, I felt that the lens will suffice for an environmental portrait lens in a pinch. You can even detect a slight circular bokeh going on here. Bokeh quality is a personal preference. I have no issues with the bokeh produced by this lens.

    Conclusion

    Meike 25mm 1.8 lens mounted on a nikon z50
    The Meike 25mm lens on the Nikon Z50, a very compact combination for street photos

    So, would I recommend the Meike 25mm f/1.8 lens as a purchase? If you are looking at the Z50 as a primary camera for some reason, and you need a cheap and easy way to get into the APS-C prime game, then this lens is a no brainer at about US$100 (cheaper used!).

    The sharpness in the centre, good performance in terms of vignetting makes this a good buy as long as you are someone who doesn’t mind taking things slow and using manual controls.

    The small, lightweight nature of the lens complements the Z50 as a travel camera as well. A wide-ish field of view at about 37.5mm full frame equivalent, bright aperture of f/1.8 will serve you well at night in your travels.

    For people needing absolute sharpness edge to edge, look elsewhere. For someone needing a cheap and cheerful lens for your Z50? A solid recommendation from me here.

    If you’re looking to pair this camera and lens set with a grip, check out my thoughts on the Smallrig Grip here.

    Personal Plug by Chris Puan

    If you found this article useful, please consider supporting me here to help pay the bills. Thanks in advance 🙂

    https://www.buymeacoffee.com/Chrispuan

  • Nikon Z50 Smallrig grip extension review

    Nikon Z50 Smallrig grip extension review

    When I first purchased my Nikon Z50 2 months ago, I enjoyed the lightweight, compact nature of the camera together with the 16-50mm f/3.5-5.6 kit lens as well as the Meike 25mm f/1.8 prime lens.

    smallrig for z50 on tripod, front

    The Nikon Z50 has a small grip

    What I didn’t find particularly nice, however, was how cramped the grip was, especially in comparison with my main camera, the Nikon Z6. Granted, it is unfair to compare the ergonomics of the two cameras, given that they are marketed towards rather different market segments and customers.

    Nevertheless, the Nikon Z50 was still a capable camera that could bring very decent capabilities to the fold for Nikon shooters as a backup camera. I approached it as such, and to me, the grip was definitely an issue when I adapted the larger F Mount lenses such as the Nikon AF-S 300mm f/4 (I used the combination for birding as I did want the longer reach that the combi gave me)

    Holding the Z50 with 300mm f/4 combination was quite a chore, as I usually gripped the tripod collar of the 300mm lens as I was trekking through the forest.

    The grip on the body was far too small for me to comfortably hold it while a heavy lens was mounted. I would imagine the limit to be the Sigma 35mm Art f/1.4 that I also had and would sometimes use as a sharp 50mm on the crop sensored body.

    For comparison, the 300mm f/4 weighs about 1.295kg while the Sigma 35mm 1.4 is 665g. The Nikon FTZ Adaptor is 135g.The Z50 alone is 450g.

    The balance of the camera and lenses are also dependent on the dimensions of the lenses, which I have not listed here (obviously, the telephoto 300mm will be far more unwieldy because it is much longer).

    Why I felt the Smallrig Grip Extension was useful

    Herein lies the usefulness of the Smallrig grip extension. While it is by no measure a full battery grip made by Nikon like those for the DSLRs, having that extension really helps when offering more purchase for your hands.

    smallrig for z50 on tripod, front
    The Smallrig grip feels good and well constructed

    The grip itself isn’t too heavy either (about 150-200g). However, it’s relatively light weight belies the metal construction. The grip itself feels sturdy, basically you are adding a metal plate to the bottom and side of the camera.

    smallrig for z50 on tripod, side
    Side horseshoe mount where you can put a small light or a mic

    Additional benefits come in the form of a side horseshoe mount. Potentially, you can now mount your microphone / receiver on the side of the camera if you so choose. You could even mount 2 different things (for example, a light on top and a mic on the side).

    smallrig for z50 on tripod, bottom
    Note the screw mount holes in the offset position
    smallrig for z50 on tripod to allow for screen flip
    The Z50 can be also mounted in a portrait position on a tripod using the grip

    Z50 users who use the camera’s downward flipping screen will also appreciate the multitude of quarter screw holes scattered throughout the bottom of the grip.

    The Smallrig grip allows the camera to be mounted in an offset position and in portrait orientation if you want to be able to see the screen while mounting it on a tripod. Of course, if you want to mount the camera in the traditional position, feel free to do so.

    smallrig for z50 on tripod to allow for screen flip
    Users of the Z50 will be able to use the camera on a tripod in an offset position

    Usage

    Personally, I use the camera with a small table tripod with a ballhead, with a microphone mounted on the side of the camera with the camera mounted offset from the centre so that I can still see myself in the screen. Of course, this is a workaround since people using cameras with articulated LCD screens on their cameras don’t even need to do this to see themselves while filming.

    smallrig for z50 on tripod, front

    Issues faced

    Now, on to the issues I faced when using the grip. The main one would be that the grip basically blocks the battery and memory card compartment of the Nikon Z50. Unless you remove the grip itself, the compartment would be inaccessible.

    I would recommend fixing the grip after you have loaded a fresh memory card and battery into the camera and it is ready for use for at least a few hours of shooting. If not, the need to remove the grip in order to swap out the grip and card would be very annoying.

    smallrig for z50 on tripod, bottom
    you can see on the right that the battery door is blocked

    A neutral point would be that the grip itself is tightened using a screw at the bottom of the plate. Smallrig has kindly included a screw key that is magnetically attached to the bottom of the plate for ease of storage.

    One issue I faced was the magnets dropping out of the bottom of the plate as they are stuck to the key itself. This is annoying but can be solved using some resin/ epoxy/ strong adhesive

    smallrig for z50 on tripod, side

    Conclusion

    Nevertheless, for an additional SGD$35, I feel the grip would be a good investment if you ever pick up the Nikon Z50, with the benefits and issues summarised below:

    1 the metal grip offers some protection for the bottom and side of your camera against impact

    2 the additional purchase afforded to your fingers will go a long way in relieving finger cramps

    3 the additional 3/4 screw mounts allow you to mount the camera in various positions in addition to the traditional centre mount (offset, portrait)

    4 there is a horsehoe mount on the side of the grip allowing you to mount an additional accessory on the side of the camera

    5 the plate blocks the battery and memory card door, make sure you install a fresh card and battery before you fix the grip otherwise it will be annoying when you constantly have to remove and fix the grip again.

    As of 2025, it has been discontinued on the Smallrig official website, but used options are there

    Personal Plug by Chris Puan

    If you found this article useful, please consider supporting me here to help pay the bills. Thanks in advance 🙂

    https://www.buymeacoffee.com/Chrispuan

  • Nikon D300s Review in 2021, a dozen years later

    Nikon D300s Review in 2021, a dozen years later

    The Nikon D300s was the minor refresh of the the excellent D300 that was the APS-C younger sibling of the full frame Nikon D3, a game changer back then due to the powerhouse specs that gave sports photographers worldwide an incredible camera that spits out full frame images at 9FPS or 11FPS in DX crop.

    The D300s increased the FPS to 7, while still keeping the 9FPS that can be had with the optional MBD-10 battery grip with the bigger battery from the D3 (more on that later).

    Ergonomics

    Nikon D300s top plate showing the control dial

    The professional grade DSLRs from Nikon has always had the shutter release mode dial and the dial for choosing white balance, file quality and ISO on the top left of the camera.

    While it does not allow for one handed use of the DSLR, it does make it very clearly marked and easy to operate using gloves since you know the controls are all there.

    nikon d300s dark shot from the front view

    The MBD-10 grip makes handling even more beefy. The camera is a beast of a machine and the grip makes it even more so. Once you use the grip, even large lenses balance very well in hand. Also, the build quality is incredible, it’s extremely solid and once properly screwed in feels just like a part of the original camera.

    Compare that to the handling of a smartphone…. let’s just say the purpose of a smartphone is to get you that picture as fast as possible, with no thought regarding the haptics and tactile feeling of a proper camera.

    Image quality

    comparing d300s shadows pushed, a lot of noise in the shadows
    Raw files from the D300s do not handle pushing in processing, note the noise on the right.

    The sensor churns out 12MP photos. The raw files are easy to edit on Lightroom on a modern computer as they load fast. Unfortunately, as this was before the era of Nikon sensors with incredible dynamic range, when you try to expose for the highlights, the shadow areas of the image will have noise after you try to perform recovery of the shadows. I would not recommend pushing the Lightroom slider for shadow beyond 50, even at low ISOs.

    In the shot above, I was trying to get a shot of the sunset and exposed for the highlights. As you can see from the original raw file, the shadows are extremely dark. After I tried pushing the shadows, color noise was extremely apparent.

    For those shooting with modern sensors in cameras such as the D800 and the Z7, such shadow noise will be much more limited (Z6 shot shown below for comparison).

    comparing nikon z6 shadows pushed
    Less noise in the Nikon Z6 shot, but there is banding in the shadows

    In terms of overall image quality though, the images are more than sufficient for upload to social media. I was using the camera for casual birding, which, given that it was originally a sport focused camera, would be something up it’s alley.

    noise in a birding shot on nikon d300s
    Noise apparent on the uniform areas

    From this image, you can see the luminance noise which makes the photo look grainy. I had to apply noise reduction to the breast area of the bird after brightening it to show the colors. Otherwise, I have no issues with sharing this photo on social media.

    Battery Life

    Nothing much to say here, except that the battery is more than enough for a full day of shooting. I would go as far as to say you can bring 2 fully charged EN-EL3 batteries for a short trip and you can leave the charger at home. Maybe about 1000+ shots per battery without shooting video?

    Can the D300s shoot video?

    Yes, the camera shoots videos.

    Does it do it well, no. Use your smartphone 🙂

    In a birding situation, I would use it to grab some videos if I am trying to use a telephoto lens mounted on the camera though.

    Value for money in 2021 and beyond

    So here’s the deal, if you can find a good condition unit that has not been abused for under SGD$200, I would say go for one, especially if you desire the haptics of a professional grade camera. Image wise, don’t expect to push the raw files as you would in a modern camera.

    nikon d300s price in 2021 and beyond in carousell
    A used Nikon D300s can be bought for S$200 or less

    In some situations, even a smartphone made after 2018, especially flagship phones from Apple or Android, will deliver better image quality especially in good light. In bad light, even a Google Pixel will deliver better performance under situations where the subject is not moving.

    Conclusion: Should you get a Nikon D300s in 2021 and beyond?

    For Beginners, buy for the shooting experience, or if you want a cheap and still capable camera for casual bird/sports photography. If you need good image quality in low light, look elsewhere for the money.

    If you are interested in looking at the older models for fun, here’s the D100 and the D200 reviews for your reading pleasure.

    Personal Plug by Chris Puan

    Please consider buying me a coffee here. Thanks for your support! 😀

    https://www.buymeacoffee.com/Chrispuan

  • Nikon D100 Review in 2021, after 20 years

    Nikon D100 Review in 2021, after 20 years

    The Nikon D100 was released in 2001, back when digital photography was still in it’s nascent stages and film was still reigning. The professional grade D1, D1X and D1H have already been released on the Nikon roster alongside the Nikon F5 (film pro grade body).

    According to DPReview, the D100 started a new camera segment in the under $2000 USD range, and was potentially a game changer as it made enthusiast grade DSLRs even more approachable for professionals and enthusiasts alike.

    Now, in 2021, 20 years after it’s entry into the market, I would like to revisit it to see how the camera has aged over the years. Coming on the back of a Nikon Z6 (my primary camera), I am under no illusion that the D100 can compete, but it would be an interesting look to see how the digital photographer technology has progressed over the years and see what has changed.

    The D100’s Ergonomics

    Grip

    nikon d100 from the front, showing the badge and the grip

    One thing that has made improvements over the years is definitely grip design. When I first held the D100, I noticed that the grip felt distinctly different from what I was used to. It wasn’t as rounded as the D3 and not as good a fit as the D750. However, I would say that the grip still allowed me to carry the Nikon AF-S 300mm f/4 with no major issues.

    Top LCD

    nikon d100 top plate, showing the small LCD panel

    One piece of technology that did not change for about 17 years (until the Z6) was the top plate LCD. Seems like the same type of LCD panel was used to display shooting information all the way until the OLED was used in the Z6 mirrorless bodies.

    On the other hand, as we only need to see the essential shooting information, the fact that it’s there at all was already very good for my shooting experience.

    Back LCD

    nikon d100 back plate

    One thing that struck me, as in REALLY hit me, was the size of the LCD. Being used to modern smartphones and tablets with their humongous, high resolution screens really made the viewing experience of the LCD on the D100 a chore.

    It was very hard to verify focus with the small, 1.8 inch screen when I’m trying to zoom in, and the dynamic range of the screen is so poor that I can’t be sure that I have exposed the shot properly.

    Still, looking at it from the 2001 perspective, it definitely one ups film cameras in that you can at least verify the rough exposure and composition of the picture you took as compared to a film camera.

    Menus

    When I opened the menus for the first time, I was speechless. This odd sense of nostalgia hit me as I was transported momentarily back to the early days of Windows 98 and Windows 2000, playing my Nintendo Gameboy and watching TV on those fat cathode ray TVs.

    Going through the menu also has a slight lag.

    The menus have gone through a huge change over the years, with UI/UX improving leaps and bounds. Still, the simple/spartan menus made it easy to navigate camera functions.

    Buttons

    nikon d100 back plate
    nikon d100 back plate, LCD

    Throughout the years, Nikon has had a bad habit of moving the button layout from generation to generation. Imagine my chagrin, then at having to relearn the button presses for quite a few functions.

    Firstly, the image review button is not a “play” arrow, but rather that monitor like display button at the top left of the camera. To magnify the image during review, you have to first press enter at the bottom to select the image, then press the middle button in conjunction with the rear dial in order to punch in.

    Way too many button presses in my opinion, I’m so glad they improved on this in their next iteration of the 3 digit DSLRs.

    Card Slot

    nikon d100 storage cover

    This was the era of small CF cards, and back then, using digital storage was already a big deal, let alone dual card slots. The card slot door is locked by a catch on the side, simply pull open the door, no button presses required. Removing the card requires the small rectangular button to be pressed, however.

    Sensor/ Image quality on the D100

    Time has not been kind to sensor tech. A sensor from 20 years ago can barely keep up even with smartphone cameras, especially those from high end phones such as iPhone Maxes and the Samsung S20s.

    With a decent prime lens like the Nikon AF-S 50mm 1.4G, one can still get some pretty good pictures that are sufficient for small prints and smartphone screens.

    Taken in the late afternoon in good light. Color was edited in post.

    Informal image quality tests

    I took a few shots in night with the camera locked off on a tripod. All images were shot at f/4 on a Nikon AF-S 50mm 1.4G for better lens sharpness.

    Base ISO 200

    At base ISO, if you pixel peep, you can already see luminance noise/ grainyness. However, I wouldn’t worry too much about it. The image is definitely useable at base ISO.

    ISO 1600

    Excuse the ghosting. ISO 1600 is noisy but I would say is useable in very low requirement scenarios like viewing on a small screen or for small prints.

    ISO H1 (3200)

    Banding in the shadows and color noise appearing as well. Modern cameras have no problem handling ISO3200 but this is 2001 tech after all.

    ISO H2(6400)

    Severe banding in the shadows as well as color noise everywhere, basically, H2 is for emergencies when you just need the shot regardless of the image quality.

    Dynamic range

    I was able to get detail from the shadow areas of the image by pushing the shadow slider in Lightroom CC to about +66. I could also recover some highlight detail from the sky by lowering the highlight slider to about -15. The image was shot at base ISO of 200. Not a bad performance from a 20 year old camera, for sure. However, modern sensors, especially the Sony made 24 MP ones, will blow this out of the water.

    Resolution

    The shot of the collared kingfisher is uncropped, but to be honest, at 6MP, there wasn’t much room for cropping anyway. I’m using a 28 inch 4k monitor and the image barely fills up the entire display. Nevertheless, I personally found the quality of the image acceptable, despite the lack of resolution.

    sample shot

    Autofocus system

    5 point Autofocus system of the D100
    Copyright @Mir D100 Article

    The D100 uses one of the first generations of AF systems developed by Nikon. The 5 point AF system worked well for it’s time, with decent single AF speed and could even track moving subjects in relatively simple scenarios.

    AF Tracking

    I was able to track a bird in flight using the 5 point autofocus system. Granted, it was taken against a cloudless sky with extremely high contrast, so I wouldn’t say that the AF system was pushed here to any extent. While we have been spoilt silly by the newest AF systems with more than 200 AF points, the 5 point system here worked to get the pigeon in focus.

    Single point speed

    I was able to grab a shot of the pigeon flying in over the water using single focus. I was using the centre point of the system but the speed was still good enough for me to get the pigeon sharp. Any blur was due to motion blur as I did not prepare for the pigeon to suddenly swoop in and was using a relatively slow shutter speed of 1/400s.

    Video

    Nothing to see here, you can take “videos” by building a time lapse from the photos shot on the D100, that’s all 😉

    Concluding thoughts

    This has not been a traditional review.

    No one in their right mind would recommend someone to buy a 20 year old camera to shoot professionally. In many cases, even your smartphone may be better than what the D100 can offer in terms of image quality.

    Still, this has been an interesting look at how technology has progressed in the digital photography realm. I’m definitely thankful to be loaned this unit by a friend who collects old cameras and keeps them in working condition.

    I’ll be looking at it’s next iteration, the Nikon D200 in the next review. if you’ve enjoyed this blast from the past look , keep a look out for the next review.

    Until next time.

    Personal Plug by Chris Puan

    If you enjoy my blog content, please consider supporting the website by buying me a coffee here. Thanks for your support! 😀

    https://www.buymeacoffee.com/Chrispuan

  • Buying used, “Outdated” full frame DSLR cameras (updated 2025)

    Buying used, “Outdated” full frame DSLR cameras (updated 2025)

    nikon d700 in mint condition
    A mint condition Nikon D700, image courtesy of Wikipedia Commons

    *This article was originally posted in 2014, but updated in 2025 to reflect some newer cameras.

    Sensor technology is advancing at breakneck speeds. High ISO performance is improving so fast that stratospheric speeds previously unheard of are now reality (it goes into the millions now!).

    But really; do people really need such high sensitivities? Professionals might, but for consumers, ISO 6400 is plenty for most shooting conditions, especially when using prime lenses.

    This is where buying older full frame DSLRs come in for photography buffs looking to get the full frame look (smoother out of focus transition, if you have no idea what this is, you probably won’t care about it).

    Full Frame DSLR Developments

    With the recent surge of full frame bodies available from Canikon, including the so called consumer typed full frame bodies, there are 15 bodies from 2007 til now. Canon1D-X, 1Ds III, 5D MK III, 5D MK II, 5D MK I, 6D, Nikon D4s, Nikon D4, Nikon D3x, D3S, D3, D810, D800, D 700, D610, D600.

    In the last 10 years after 2014, almost every camera manufacturer has stepped up in their camera offerings for full frame cameras on both DSLRs and Mirrorless Cameras. I focus on DSLRs here since they are “older”.

    There are now sufficient full frame bodies, both new and pre-loved, to satisfy almost every photographic niche.
    So, what would be a good choice for you to step into the full frame world?

    System choice aside, stick with something you are familiar with. Most importantly, get something you are comfortable with lugging about on shoots. Any of the cameras above will do the job for many situations that people face, though some will do better than others in specific situations.

    Personal Experience Using an Older Camera

    Personally, I bought the Nikon D3 sometime in 2013, and I have never been let down by it, except in the most challenging of situations (think near darkness where even your naked eyes have trouble discerning anything).

    I can say that using a D3 released me from any perceived limitations, any shot missed is truly my own fault. The speed and capabilities of the flagship body is such that the camera takes the shot at the slightest of touches and reacts as fast as you can.

    The D3’s soul was carried on by other cameras since then, and the closest replacement camera I have now is the D500 (used), but that is a story for another day.

    Take note that with the accompanying large sensor size, compatible lenses will necessarily be large and heavy. Barring technological advancement, this is how it will be for the coming few years ahead. Hence, think about what you intend to shoot. Will it be fast paced sports, portraits, landscapes?

    2 Common Used DSLRs People Recommend

    I will be listing 2 of the original “old but accessible” full frame cameras under several general shooting categories for the uninitiated.

    The Nikon D700 and Canon 5D Mark II remain capable, somewhat fun cameras to use at a budget for budding photographers looking for something cheap, durable but very much still capable (even in 2025).

    used nikon d700 DSLR
    A lightly used Nikon D700 in Singapore can be bought for S$650 or less.
    used Canon 5D Mark II DSLR
    A lightly used Canon 5D mark II can be had for S$375

    Of course, each camera can be used for any purpose that you deem fit, the grouping simply makes the choice slightly more “optimised” for that usage.

    Here goes:

    Landscape: Canon 5D Mark II

    The high megapixel count of 21 MP definitely works in the 5DMark II’s favour over its Nikon equivalent (12MP). The relatively poor autofocus is not critical given that your static landscape photo op isn’t exactly going to test the agility of the AF system.

    Macro: Canon 5D Mark II

    Once more, the high megapixel count will work in its favour. Macro shots favour detail above all, more  megapixels should, all things being equal (light availability, for instance), mean more detailed photos. Another big plus for the Canon lies in the form of the MP-E 65mm, a specialty Macro lens that has no equal (to my knowledge) in the Nikon or Sony lens lineup.

    Canon_MP-E65mm

    Having the MP-E with a 5D Mark II will set you back quite a fair sum, be prepared to feel some pain in the wallet. Of course, if you are on a budget, the 100mm USM Macro will fulfill your purposes just fine.

    Sports: Nikon D700

    Qualities valued in sports is responsiveness, autofocus speed and high frame rates per second (FPS). Short of going all the way to the former flagship D3, the D700 will be the camera that gives Nikon users all they need for sports. 8 FPS (with grip), 51 point AF system, excellent buffer capacity and superb high ISO performance ensures that the D700 will serve you well in a sports shooting situation.


    Street shooting: Nikon D700

    Again, qualities to look out for are similar to that of sports. High ISO performance during night shoots (from past experience, the raw file is forgiving at ISOs of up to 3200), responsiveness (instant on, ready to shoot), quick and accurate AF (the Nikon 51 point AF system is still so good), all help with capturing “the Moment”.

    Video: Canon 5D Mark II

    This is a no brainer. Short of going to Sony Mirrorless bodies, the venerable Canon 5D Mark II was the camera to go to (pre-2010) for video shooting and the one that made HD DSLR Filmmaking mainstream. Excellent bit rate, decent filming ergonomics make the 5D Mark II a superb performer on the video arena.

    For people willing to tinker with the camera’s firmware, Magic Lantern has an excellent update for the 5D Mark II that opens up many useful features, and for free as well.

    Magic Lantern Liveview Overlay on the 5D Mark II, image from Wikimedia Commons

    General shooting: D700

    Nikon D700 with a Nikkor 50mm 1.2 prime lens
    Image Courtesy of Nokton (https://www.flickr.com/photos/nokton/2994927246)

    Call me biased here, but I favor the D700 simply due to the very manageable 12 Megapixel files. Quite simply, smaller but still very malleable raw files make it a pleasure to edit the files in either Lightroom, Capture Pro or your raw processor of choice.

    Also, don’t forget storage (either on your computer or on the go) is much easier with smaller files. Storage may be cheap, but hey, whatever helps right?

    This article may go outdated very quickly, given how fast new full frame models are being thrown out of factories .

    Nevertheless, if you are on a budget but still want the full frame look and older high specification performance, older DSLRs are definitely worth a look. If you’re looking for a prime lens to go with your camera, I review the Sigma 85mm 1.4 HSM.

    Which one you choose will likely depend on your personal preference and pricing and availability.

    PS. Looking for something smaller? I talk about the entry level Nikon D3200 vs the Olympus OMD EM5 here.

  • Nikon D3200 vs Olympus OMD EM5 for General Photography (updated in 2025)

    Nikon D3200 vs Olympus OMD EM5 for General Photography (updated in 2025)

    I personally own a Nikon System with Olympus being my sub system. Back in 2014, my D3200 was mainly for high MP work while the OMD was for street and general shooting.

    Nevertheless, this period in the early 2010s still remained the age of DSLRs, though the revolution of mirrorless cameras is currently under-way. There are times when I still favour a DSLR and here are some reasons I do bring my DSLR out.

    1. Ergonomics, the bigger Nikon D3200 or the smaller OMD EM5

    Somehow,  I still feel that handling on the Nikon D3200 is better,  despite the it being an entry level body.

    Being able to tweak everything on an OMD is nice,  but the small body with the strap lugs digging into my palm or fingers really don’t cut it.
    A Nikon D3200 with a small prime like the 35mm or the 50mm is still a very compact package. Somehow,  this set just sits in my hand really comfortably. Even if you do have large hands, the pinkie can be tucked under the camera for a 3 fingered right hand grip.

    difference in size between the OMD EM5 with a grip and Panasonic Pancake Lens vs the Nikon D3200 and Nikon AFS 50mm 1.4G
    Note the difference in size, the OMD EM5 with a grip and Panasonic Pancake Lens vs the Nikon D3200 and Nikon AFS 50mm 1.4G

    2. Pixel count, 16 in the EM5 vs 24 in the D3200

    Say all you want about high megapixels being terrible in light, but when you can shoot in good light, having more MP is rarely a bad thing. If not, why do people bother with high MP medium format? That extra 8 MP meant that extra bit of cropping allowance. Also, i do have the lenses which allow me to resolve that extra bit of detail. This brings me to my next point.

    100% crop from photo taken with D3200 with diffused strobes
    100% crop from photo taken with D3200 using 50mm at f4 with diffused strobes at ISO 100, note the amount of detail even at this level of magnification.

    3. Lenses, Nikon F Mount vs Olympus M4/3

    I was already a serious Nikon shooter for some time before I dived into M4/3. As it stands,  I own a small arsenal of FX lenses and quality primes for the F mount, compared to 2 small primes for the Olympus,  the Panasonic 14mm 2.5 and the 45mm 1.8.

    The AF on the OMD and the two primes are fast enough for most people, but nothing beats the feel of the lightning fast AF of the Nikon AF-S 24-70 f/2.8, even on the entry level D3200, and the images that pop out of the camera. However, I doubt if most people really need that extra burst of AF speed offered by the professional grade lens.

    Finally, take note of the tremendous price difference between just the 24-70mm ($1800 second hand) and the two primes($450 for both). *Take note this was back in 2014, in 2025, based on checks on Carousell, Singapore’s second hand market.

    Olympus OMD EM5, showing pricing in Singapore
    this set was sold at S$299 in 2021.
    Nikon D3200 with lens to show pricing in Singapore
    This D3200 set with lens is being sold at S$225 in Jul 2025

    Camera Recommendation

    Personally, in 2025, I’d recommend the lighter combination especially for people doing this as a hobby. Given a choice, most people will like prefer something small and lightweight despite the minor image quality compromises.

    PS. Prefer something bigger? I talk about the Nikon D700 vs the Canon 5D Mark II here.

  • Adapting Nikon Telephoto Lenses to Micro Four Thirds Cameras

    Adapting Nikon Telephoto Lenses to Micro Four Thirds Cameras

    Getting a longer reach using full frame lenses on Micro Four Thirds

    An Micro Four Thirds adaptor costing just SGD$30 was used to mount the lens onto my Olympus OMD EM5. The full combination included the adaptor, a Tamron 1.4x Teleconverter and the Nikon AF-S 300mm f/4.

    This gave a set up that had an 840mm effective focal length, albeit with full manual operations, including focus and aperture adjustments.

    This effective focal length would no doubt be very appealing to bird photographers on a budget, also to those looking for long reach without the accompanying bulk and weight.

    Controlling the adapted full frame lens on the Micro Four Thirds camera

    Operating the set up required patience, lots of it. The adaptor allowed the control of aperture, with some clicking heard when adjustments are made.

    Focus is done manually, by activating the magnification feature of Olympus cameras using one of several customisable buttons found on the OMD.

    I personally use Fn1, but anybody can choose to customise the OMD operation using another Fn button.

    It must be noted that the focus is made harder due to the physical stopping down of the aperture blades, making for a darker viewfinder image. This is partially offset by the fact that the OMD has an EVF, allowing the artificial brightening of the image preview to some extent.

    Image quality is decent, I find that the lens performs better on native cameras like the D3 and even the D3200 with its high pixel density. This is only natural since lenses are generally optimised for their own system.

    The hassle of having to use this lens on a tripod in field conditions together with full manual operation may restrict its effectiveness for birding, which will no doubt be its primary application.

    During a birding trip to the Chinese Gardens in Singapore, I was able to get some shots of stationary birds like perching Kingfishers only.

    Jittery ones such as the Ashy Tailorbird proved impossible to capture using this setup. Some sample shots of my birding trip have been included for illustration purposes.

    Image Quality of the adapted telephoto prime on the Micro Four Thirds camera

    plaintain squirrel shot using Nikon AF-S 300mm f4 on m4/3
    Plaintain squirrel shot using Nikon AF-S 300mm f4 on m4/3

    This plantain squirrel seemed to be fetching straw for its shelter. It was rather still and gave me ample time to set up and take a few shots before it scampered off.

    water monitor lizard shot using Nikon AF-S 300mm f4 on m4/3
    Water monitor lizard shot using Nikon AF-S 300mm f4 on m4/3

    I managed to snap a Malayan Water Monitor Basking by the pondside. I could have done better justice to this particular scene with the magnificent backlighting, pardon my poor skills.

    common kingfisher shot using a nikon 300mm adapted to m4/3 camera

    Here is a common Kingfisher observing fish from its perch, which later dived into the water. The set up was too cumbersome to track the bird with as it flew off.

    There was no issues with image quality regarding sharpness for the lens adaptation. Another thing was that the IBIS of the Olympus EM5 helped with hand holding, though the long focal length and the need to manual focus meant that you will likely be using the entire set up using a tripod.

    Should you adapt a full frame telephoto lens onto a micro four thirds camera?

    Your mileage may vary with both your skill and luck. Some users may simply use the lens on a Nikon D7100 or the new D7200, with their built in 2x crop factor mode which allows the entire viewfinder to be covered with the 51 AF points, allowing for superb tracking ability.

    Nevertheless, one may find this combination suitable for their use, since a cheap adaptor can be had easily and the native x2 crop factor of the Micro Four Thirds system is useful for extending telephoto purposes.